HDR software is helpful because it streamlines what would normally be a very tedious process (combining the properly exposed areas of several photos into one). Still, unless you are comfortable with the characteristic 'look' of HDR, it can take a lot of time and effort to produce results that could pass for a conventional photo (though the 'Natural' preset in Photomatix does a reasonably good job with many subjects). This is not the software's fault... the problem is, you can expand the dynamic range all you want, but as soon as you start remapping all that data in order to squeeze it back into the space available (the dynamic range of a monitor or print), something has to go... usually what we end up with is an expanded range of midtones and a much lower amount of nearly white or nearly black. In other words, a flat image reminiscent of a painting or illustration. The upside is that the HDR programs have some very complex routines for restoring microcontrast which restores depth to a certain extent, but at the expense of haloing (tho this can be controlled with the adjustments in most software). However, the best way to get an HDR photo to look like a regular photo is to get rid of some of the information during the remapping process... in other words, set a white point and black point closer to that of a normal photo and settle for some pure black shadows and some blown highlights... examine your image carefully and just save what needs to be saved, let the rest go.
This is sort of what we do when we use shadow/highlight recovery in Photoshop... when recovering shadows we select how much of the shadow range we want recovered, the quantity of recovery we want within the recovered range, and how smooth a transition between recovered and non-recovered areas (the halo). The problem is, this only works if there is detail in those shadows to begin with, and even if the detail is there, bringing it out also brings out noise.
But if we try to do the same thing with an HDR image, those shadows are properly exposed (hopefully) in one of the lighter source images, so we have some noise-free data available. Ideally, it'd be great if we could take a 32-bit HDR file into Photoshop and do our highlight and shadow recovery... that way, we would be starting with the look of a conventional photo and only using the HDR data to help out in the problem areas, rather than starting with a full HDR image and trying to fuss with the midtones to get the final photo to look more conventional. It seems more intuitive to work that way since that's what photographers have always done (for example, in the darkroom, you select the best exposure for the majority of your print, then burn and dodge only to rescue "problem" areas). Unfortunately, Photoshop won't let you use shadow/highlight recovery on 32 bit images, so you have to tone map the HDR image down to 16 bit first.
Still, I think there must be some way to do this in the HDR software... to work away from a normal narrow-range photo toward HDR, rather than working away from HDR toward a conventional photo. I'm going to play with the software some more and see if this is possible.
In the meantime, I am sitting here in front an older computer without my Photomatic, and using a pre-HDR version of Photoshop. I started thinking that perhaps I could "work backwards" the old fashioned way: With masks. Yeah, it might be time-consuming ... but it might also be more intuitive, given the many hours in the darkroom, not to mention all those drawing and painting classes. Maybe if I'm not too rusty I could do this quickly enough for it to be a reasonable alternative to HDR software.
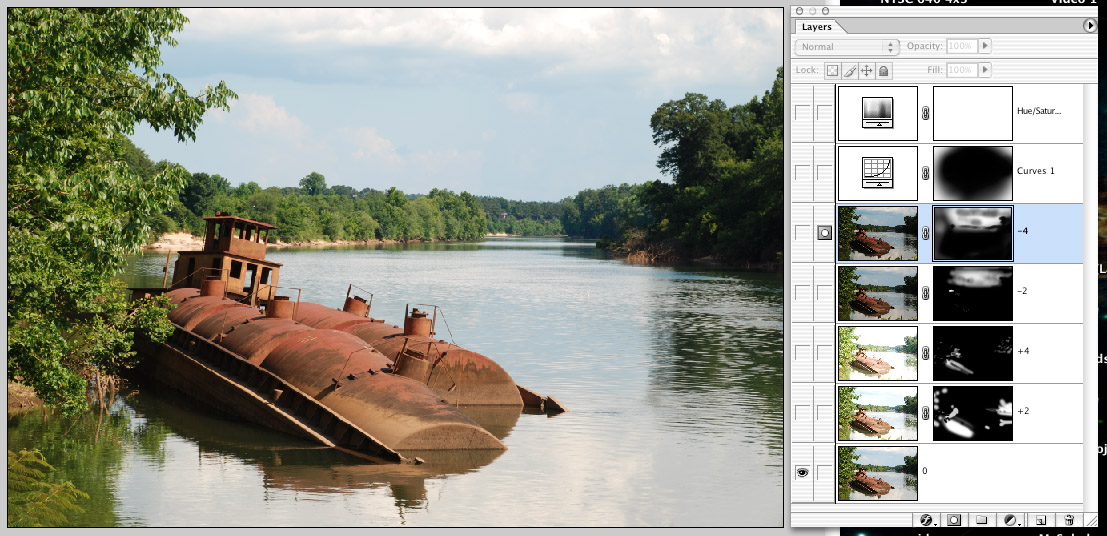
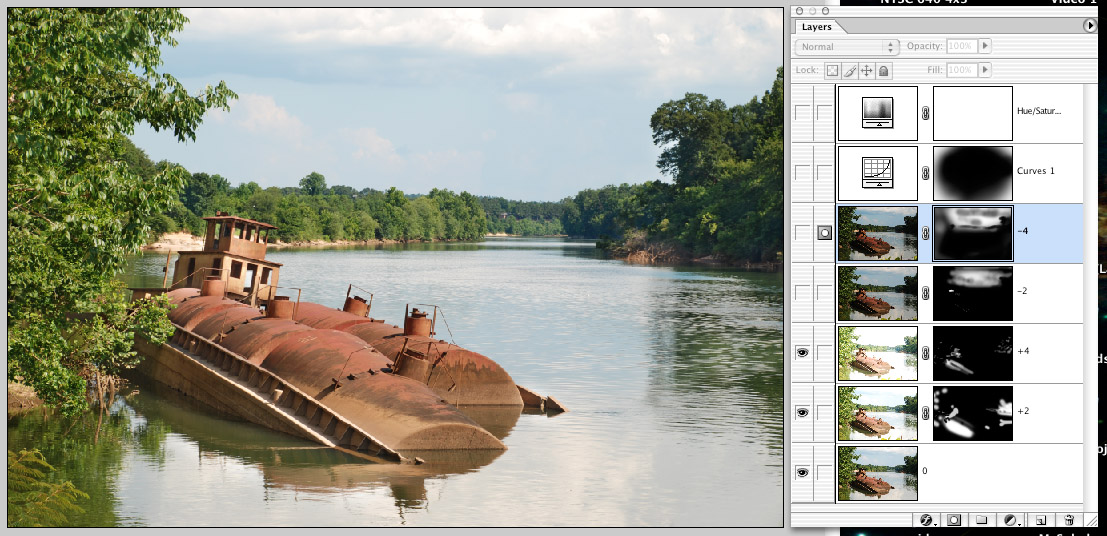
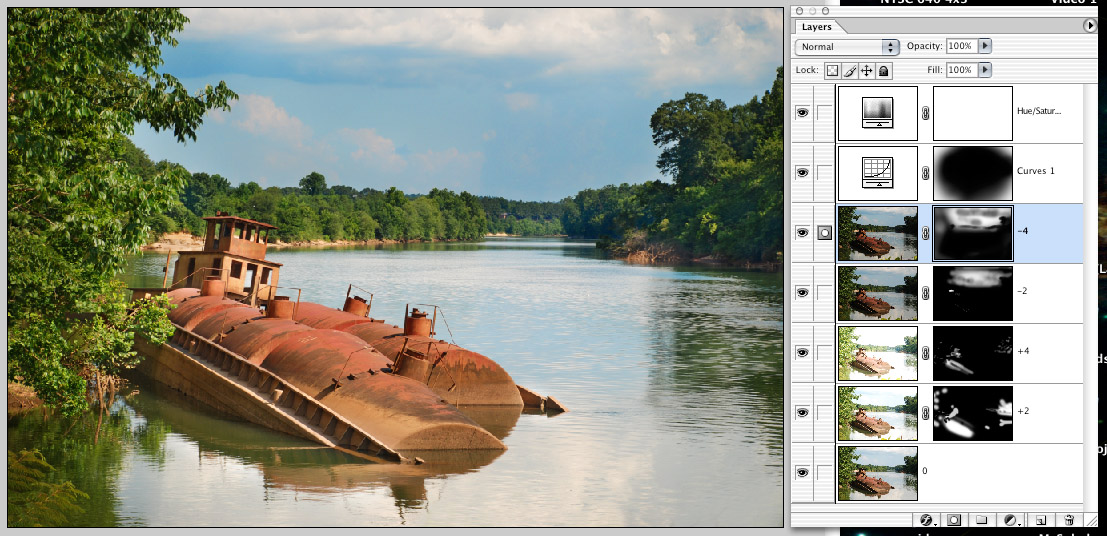
So first thing, I put together a single Photoshop file with my five source images, with the best exposure on the bottom, followed by the two lighter exposures and the two darker ones: |